Glueless Wig Install: The Elastic Band & Mousse Melting Method for Total Edge Preservation
For over a decade, achieving an undetectable lace frontal required harsh cyanoacrylate-based glues and heavy alcohol solvent removals that decimated vulnerable natural edges. The modern glueless revolution replaces chemical adhesion with physics-driven mechanical tension and lightweight film-forming mousses, delivering an imperceptible scalp melt with zero follicle stress.
Core Principles of Glueless Installation Architecture
- 1. Occipital Vector Anchoring: Rather than pulling backward on delicate temple follicles, the sewn elastic band uses the cranial curvature below the inion (occipital protuberance) to seat the wig downward and flush against the forehead.
- 2. PVP/VA Copolymer Film Physics: Modern styling mousses utilize water-soluble polyquaternium and PVP/VA polymers that create microscopic cohesion between the lace monofilaments and skin without chemical pore clogging.
- 3. Contact Dermatitis Elimination: Bypassing ethyl cyanoacrylate glues and isopropyl-heavy bond removers eliminates the risk of allergic contact dermatitis, chemical burns, and severe inflammatory shedding around the hairline.
- 4. Immediate Evening Detachability: Sleeping in lace units increases shear friction against the pillow by 300%. The glueless method permits rapid nightly removal to safeguard both your wig construction and biological edges.
1. The Biological Toll of Adhesive Installs: Why Stylists Pivoted to Glueless
The hairline perimeter contains the thinnest skin on the human scalp and some of the most delicate hair follicles. Vellus and intermediate hairs along the frontal contour have shorter telogen resting phases and shallower root bulbs than follicles on the vertex.
When liquid wig adhesives—frequently containing acrylate copolymers, solvents, and plasticizers—are painted directly over or immediately adjacent to these hairs, two catastrophic dermatological processes occur:
Follicular Occlusion & Chemical Sensitization
Continuous adhesive coverage prevents sebaceous drainage and oxygen transfer, trapping sweat, salts, and microbes against the stratum corneum. This triggers contact dermatitis, erythema, and severe inflammatory follicular degradation, often mistaken for simple dandruff. Review our targeted salon treatment in Scalp Detox & Clarifying Heavy Buildup.
Mechanical Depilation During Removal
Even high-end alcohol bond removers require friction, rubbing, and scraping with fine-tooth combs to dissolve polymer bonds. With every hasty removal, dozens of anagen-phase hairs are ripped out by the root sheath, eventually leading to permanent cicatricial or traction-induced alopecia along the temples.
The glueless install eliminates these threats entirely. By relying on structural tension around the base of the skull rather than chemical bonding to the forehead, your biological edges remain 100% free of glue, tape, and solvent exposure.
2. The Engineering of the Adjustable Elastic Band Method
The elastic band method is frequently misunderstood as simply sewing a random piece of rubberized webbing into the nape of a wig. In clinical salon styling, it is a calibrated mechanical anchoring system designed around cranial anthropometry.
Measuring the Cranial Vector
To achieve security without tension headaches, measure your head circumference along the exact path the band will travel:
- Place the start of a flexible vinyl tape measure at the left ear tab position (just above and slightly behind the ear cartilage).
- Run the tape downward across the nape, resting precisely below the external occipital protuberance (the subtle bony ridge at the base of the skull).
- Bring the tape up to the corresponding point behind the right ear tab.
- The 1.5-Inch Reduction Rule: Subtract exactly 1.5 inches (3.8 cm) from this measurement if using standard 1.25-inch to 1.5-inch ribbed knit elastic. This deduction accounts for elastic hysteresis and provides the exact horizontal holding force required to pull the front lace flush without compressing temporal arteries.
Surgical Sewing Placement
Turn your wig inside out on a canvas styling block. Never stitch the elastic band directly to delicate frontal lace mesh. Anchor each end to the reinforced poly-mesh ear tabs or the sturdy perimeter band where machine-wefted tracks meet the ventilated lace.
Stylist Pro Tip: Stitch using heavy-duty, bonded polyester thread with a cross-box reinforcement stitch (a rectangle with an "X" through the center). This distributes shear stress across 1 square inch of fabric rather than a single row of perforations, preventing lace tearing during vigorous head movement.
For maximum versatility, incorporate adjustable bra hooks or sliding silicone buckle adjusters onto the elastic band. This allows you to tighten the band when heading out into gusty coastal winds or loosen it during low-key work-from-home sessions.
3. The Mousse Melting Method: Polymer Chemistry for an Invisible Lace Illusion
If there is no glue holding the front lace down, why doesn't the edge flap, roll, or lift in the wind? The answer lies in the surface tension and polymer chemistry of modern foaming setting mousses.
How Mousse Melts Lace Without Residue
Traditional lace glues dry into thick, semi-rigid acrylic or polyurethane polymers that reflect light when sweating occurs. In contrast, premium styling mousses rely on low-viscosity, film-forming copolymers such as Polyquaternium-11, PVP/VA Copolymer, and hydrolyzed silk proteins.
When a lightweight foaming mousse is smoothed over the lace and placed under elastic compression:
- The liquid phase evaporates, depositing an ultra-thin, flexible polymer film across each woven lace fiber.
- This film fills the microscopic air voids between the lace grid and the uneven topography of the skin.
- By eliminating refractive index differences between the lace mesh and the epidermal surface, ambient light passes straight through without bouncing off white or gray lace knots, rendering the perimeter virtually invisible.
4. The 5-Step Master Salon Glueless Installation Protocol
Follow this precise sequence utilized by senior stylists at Kayla's Beauty Supply to achieve flawless, all-day stability:
Braid your natural hair into 8 to 12 small, flat cornrows straight back into an anchoring horizontal braid along the nape. Ensure the front half-inch is braided with zero perimeter tension to protect follicle roots. Lightly lubricate the exposed forehead with 2 drops of jojoba oil to prevent trans-epidermal moisture loss.
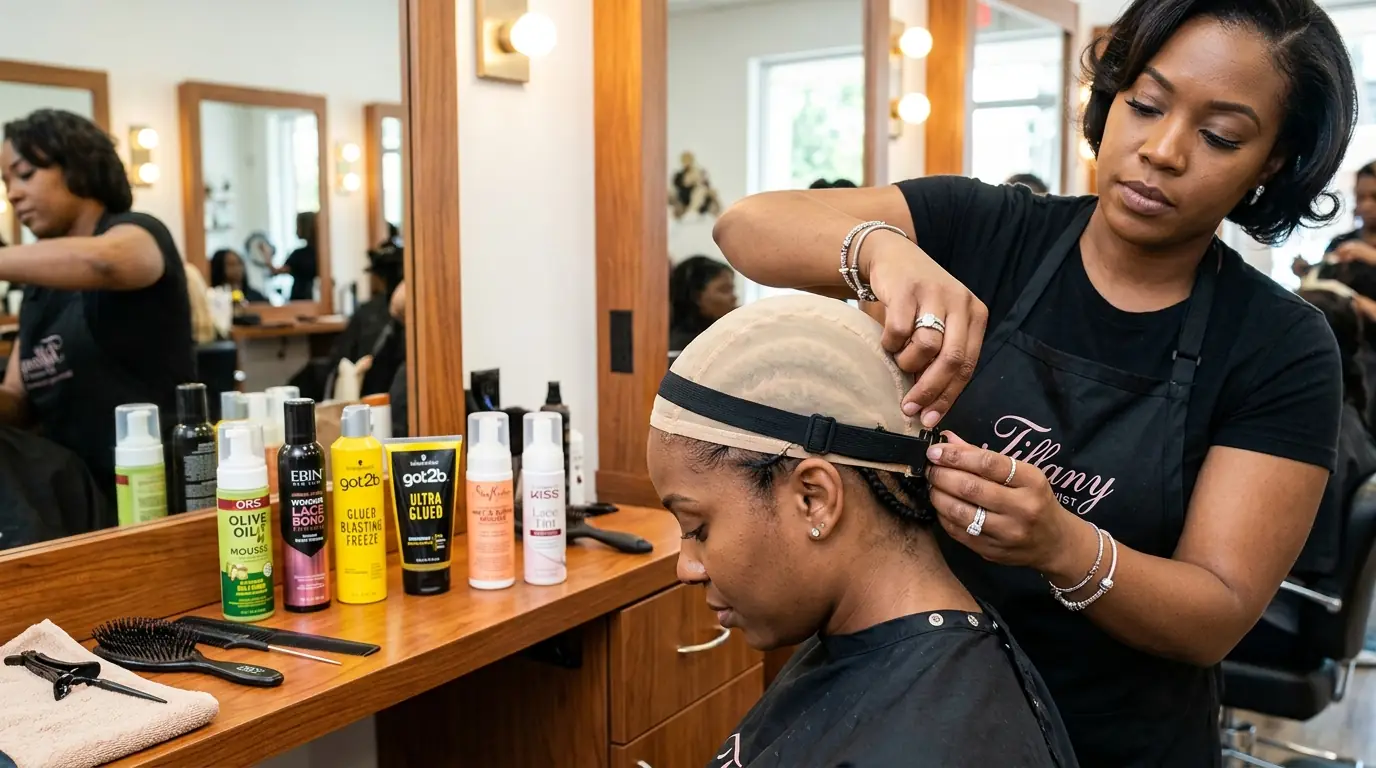
Slip on an ultra-thin HD stocking cap matched closely to your complexion. Instead of gluing down the cap rim with freeze sprays, tuck it behind the hairline or trim it right to your hair boundary. Apply a light dusting of translucent mineral powder to the underside of the wig lace to match your scalp undertone.
Place the elastic band firmly below your occipital ridge first. Roll the wig forward over your crown and position the pre-cut lace approximately 1 to 2 millimeters in front of your natural hairline. The elastic tension should pull the front lace flat and smooth against the skin without buckling or lifting at the temples.
Dispense 2 pumps of an alcohol-free, vitamin-infused foaming mousse directly along the hairline. Using a rat-tail comb or a soft bristle edge brush, sweep the foam backward through the lace knots and hairline fibers. This aligns baby hairs and forces the liquid polymer into the lace grid.
Tie a 2-to-3 inch wide satin-lined elastic melting band securely across the frontal perimeter. Apply low-temperature heat from a handheld blow dryer or sit under a hooded dryer for 10 minutes, followed by 2 minutes of cool air to lock the polymer lattice. When you release the band, the lace will appear melted directly into your pores.
5. Night Preservation and Daily Reapplication Protocols
The greatest advantage of the glueless install is flexibility. You have two primary maintenance options depending on your lifestyle:
Option A: Nightly Removal (Optimal Edge Health)
Simply unhook the elastic band or slip it forward, lifting the wig from back to front. The dried mousse peels effortlessly away from your skin with zero pull, leaves no tacky residue, and requires no chemical solvents. Store the wig on a mannequin head, apply your nightly scalp serum, and sleep in a high-grade bonnet. Review our protective sleep standards in Protective Styling Longevity & Scalp Integrity.
Option B: Multi-Day Wear (Up to 3 Days)
If you prefer to sleep with the wig installed, wrap the perimeter firmly with a wide satin band before pulling a roomy silk bonnet over the entire head. In the morning, if slight lifting occurs around the temples due to nighttime perspiration, apply a quarter-sized pump of mousse, tie the melt band on for 5 minutes while brushing your teeth, and release for an instant salon refresh.
6. Formulator's Product Guide: Mousses to Buy vs. Ingredients to Avoid
Not all mousses are suitable for lace melting. Use this formulation checklist when stocking your styling station:
| Ingredient Category | Beneficial Actives (Seek These) | Detrimental Actives (Avoid These) | Impact on Lace & Scalp |
|---|---|---|---|
| Film Formers | Polyquaternium-11, PVP/VA Copolymer | Acrylate/Octylacrylamide Polymers | Beneficial actives provide flexible hold without white flaking; harsh polymers cause crusty buildup on lace grid. |
| Solvent Carriers | Deionized Aqua, Aloe Barbadensis Leaf Juice | SD Alcohol 40-B, Isopropyl Alcohol | Alcohol dehydrates natural hair follicles, dries the lace knots causing shedding, and leads to contact itching. |
| Humectants & Conditioners | Hydrolyzed Silk Protein, Panthenol (B5) | Heavy Mineral Oils, Petrolatum | Proteins improve hair flexibility at lace knots; heavy oils prevent the polymer film from gripping the skin. |
| Preservatives | Phenoxyethanol, Ethylhexylglycerin | Methylisothiazolinone (MI/MCI), Parabens | Isothiazolinones are high-risk contact allergens that can induce acute contact dermatitis under tight headwear. |
Frequently Asked Questions: Glueless Wig Installs
Can a glueless wig stay secure without any glue or gel?
Yes. A properly tailored adjustable elastic band generates horizontal and downward mechanical tension anchored behind the occipital bone. When combined with silicone grip caps or temple adjusters and a mousse melt compression, the wig withstands wind, active head turning, and daily movement without lifting.
How long does a mousse melted lace install last?
A mousse melt typically maintains an undetectable finish for 1 to 4 days, depending on perspiration, sebum production, and atmospheric humidity. Because mousse utilizes flexible water-soluble polymers rather than polymer resins or cyanoacrylates, it easily rinses clean, making it ideal for daily or frequent evening removal.
Will an elastic band cause traction alopecia on my edges?
When calibrated correctly, the elastic band completely bypasses the fragile front hairline. The tension is distributed horizontally across the sturdy temporal bones and the occipital ridge at the base of the skull. Tension alopecia only occurs if the band is cut excessively short or if attached combs are forced into natural perimeter follicles.
What type of lace works best with the mousse melting method?
Ultra-thin Swiss HD lace (ranging from 0.05 to 0.08 mm in thickness) performs exceptionally well with mousse melting. Its gossamer-fine mesh readily conforms to microscopic epidermal ridges under the compression of an elastic wrap, achieving a seamless melt that thicker French lace cannot match.